

Over the years, I have done my fair share of closet organizations. My favorite ones to date have been ones where we changed the layout of the closet and added in built-in shelves and installed hooks and hangers for all our items (like this hall closet and our easy built-in closet DIY, and divided closet DIY).
But, what do you do when you either can’t or don’t want to add permanent shelves or drill into walls (or that’s just not a skill set that you have)? Do you have to miss out on all the organization? I’ve got some good news for you … you don’t!
I’m not a renter at the moment, but I have a closet that either may not be a closet in the future (we may move a wall when we do a bathroom renovation) or we may need to switch the function of the closet (more of a linen closet than a broom closet). So I didn’t want to commit to building out a permanent structure that would be hard to disassemble or change in the future.
Thankfully, there are several ways to build out your closet with non-permanent items that will last for as long as you want them (from months to years) and you can take it all out in a snap when you move out or don’t need it anymore. These tips are great for both renters and those who aren’t handy with tools since there’s no drilling involved. Here’s how I optimized my space:
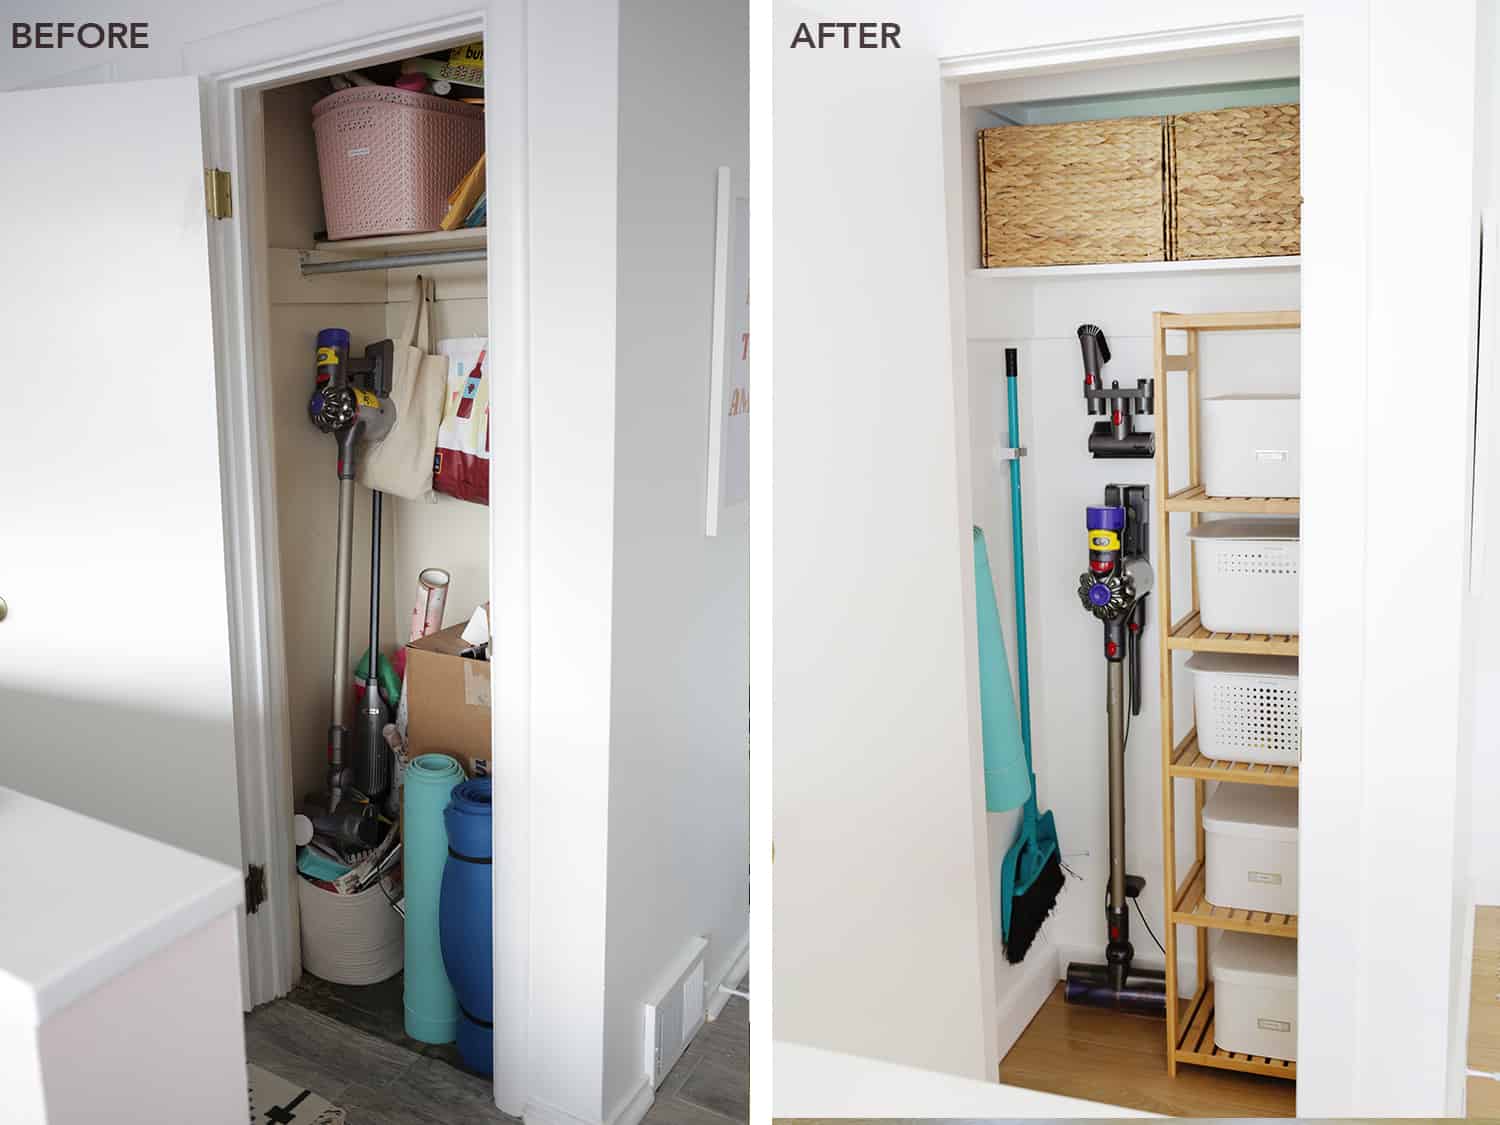
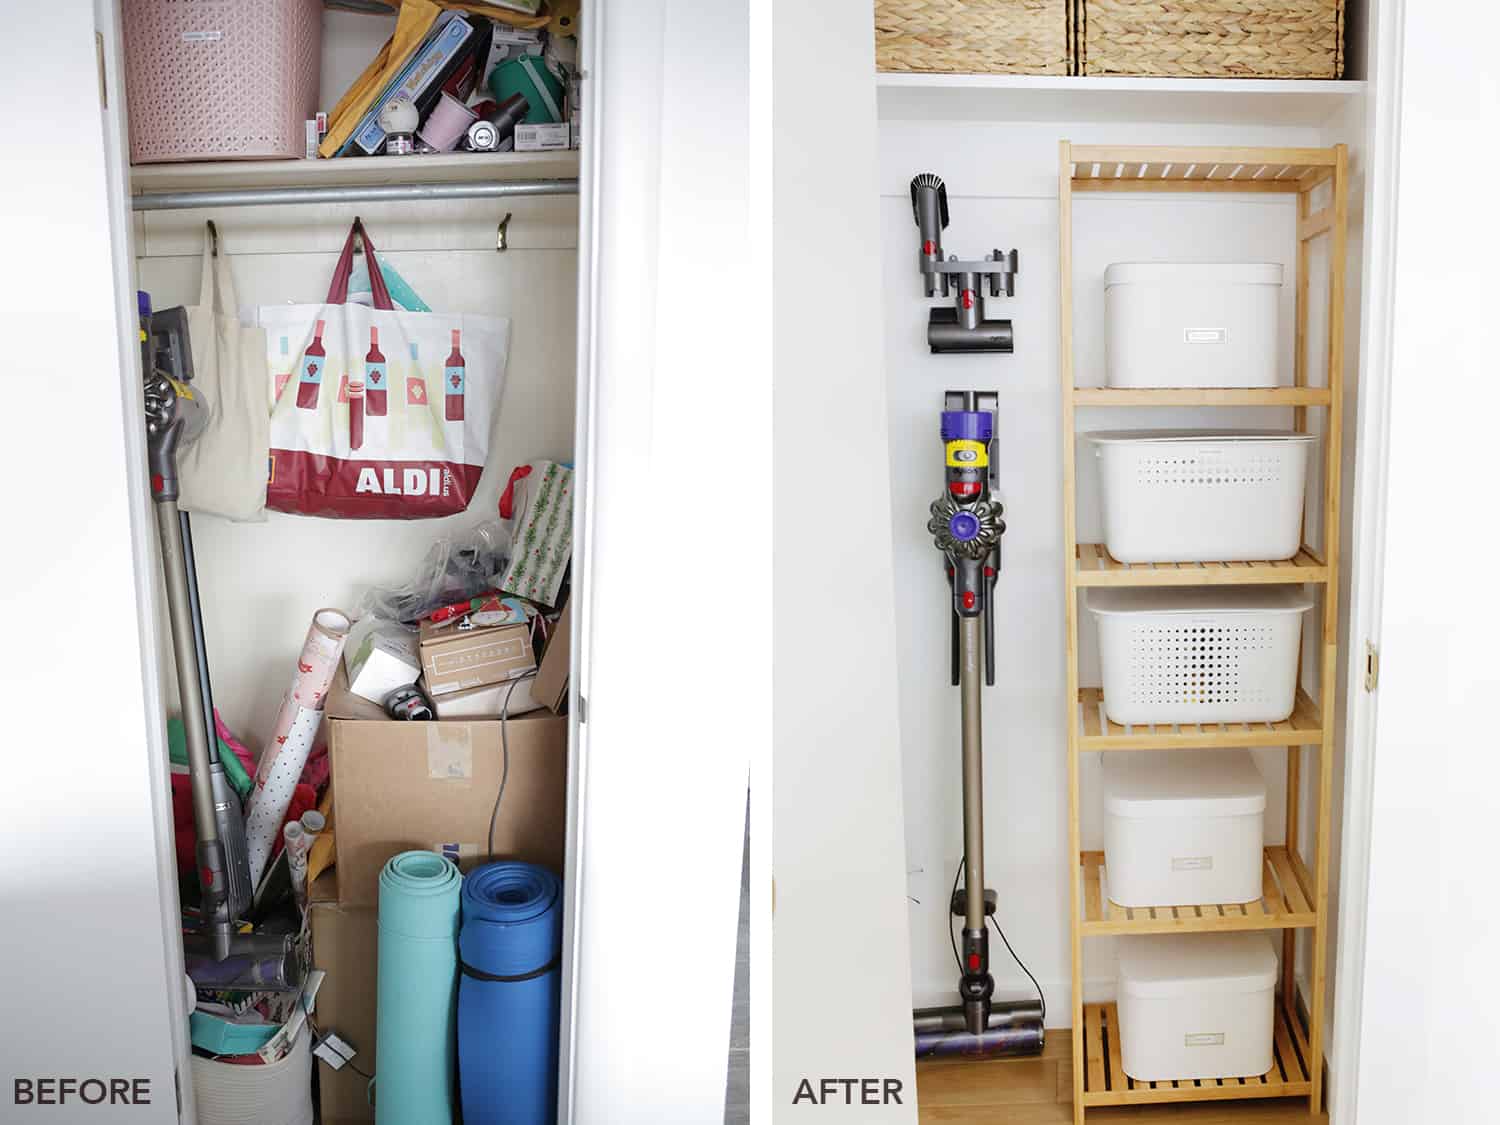
You can see how the closet was basically just items stacked on each other when we first moved in. To get this dingy closet to a starting point, we did some painting and removed the old hardware that was in awkward spots or that we weren’t going to use (like the closet rod).
Even though it’s kind of an annoying job, I love a good closet refresh when you start with one that’s pretty dingy and musty (had to remove some mold too—ugh) and get it to a fresh blank slate.


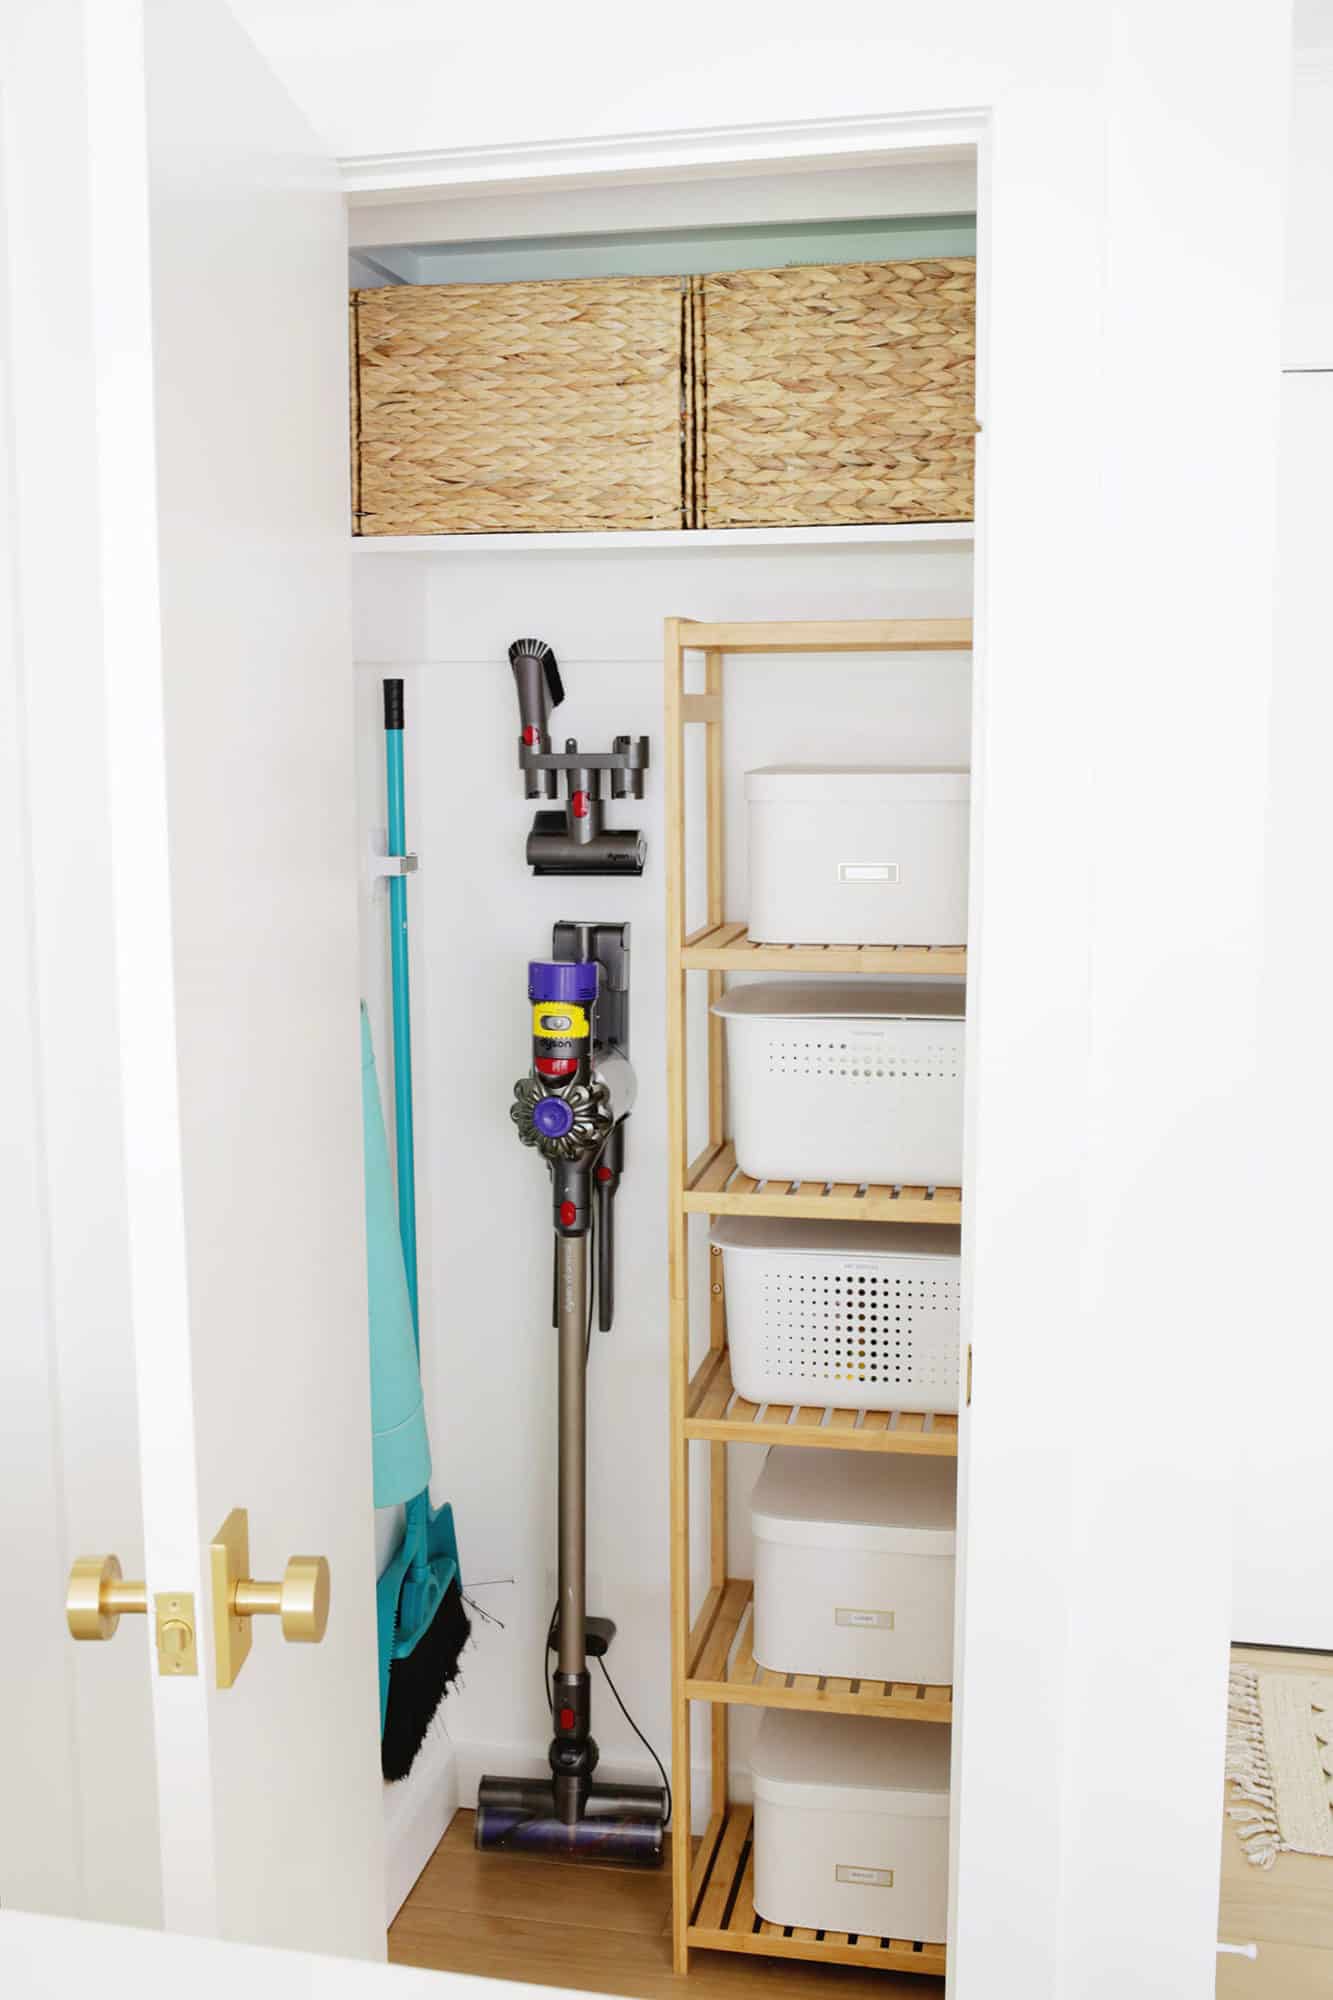
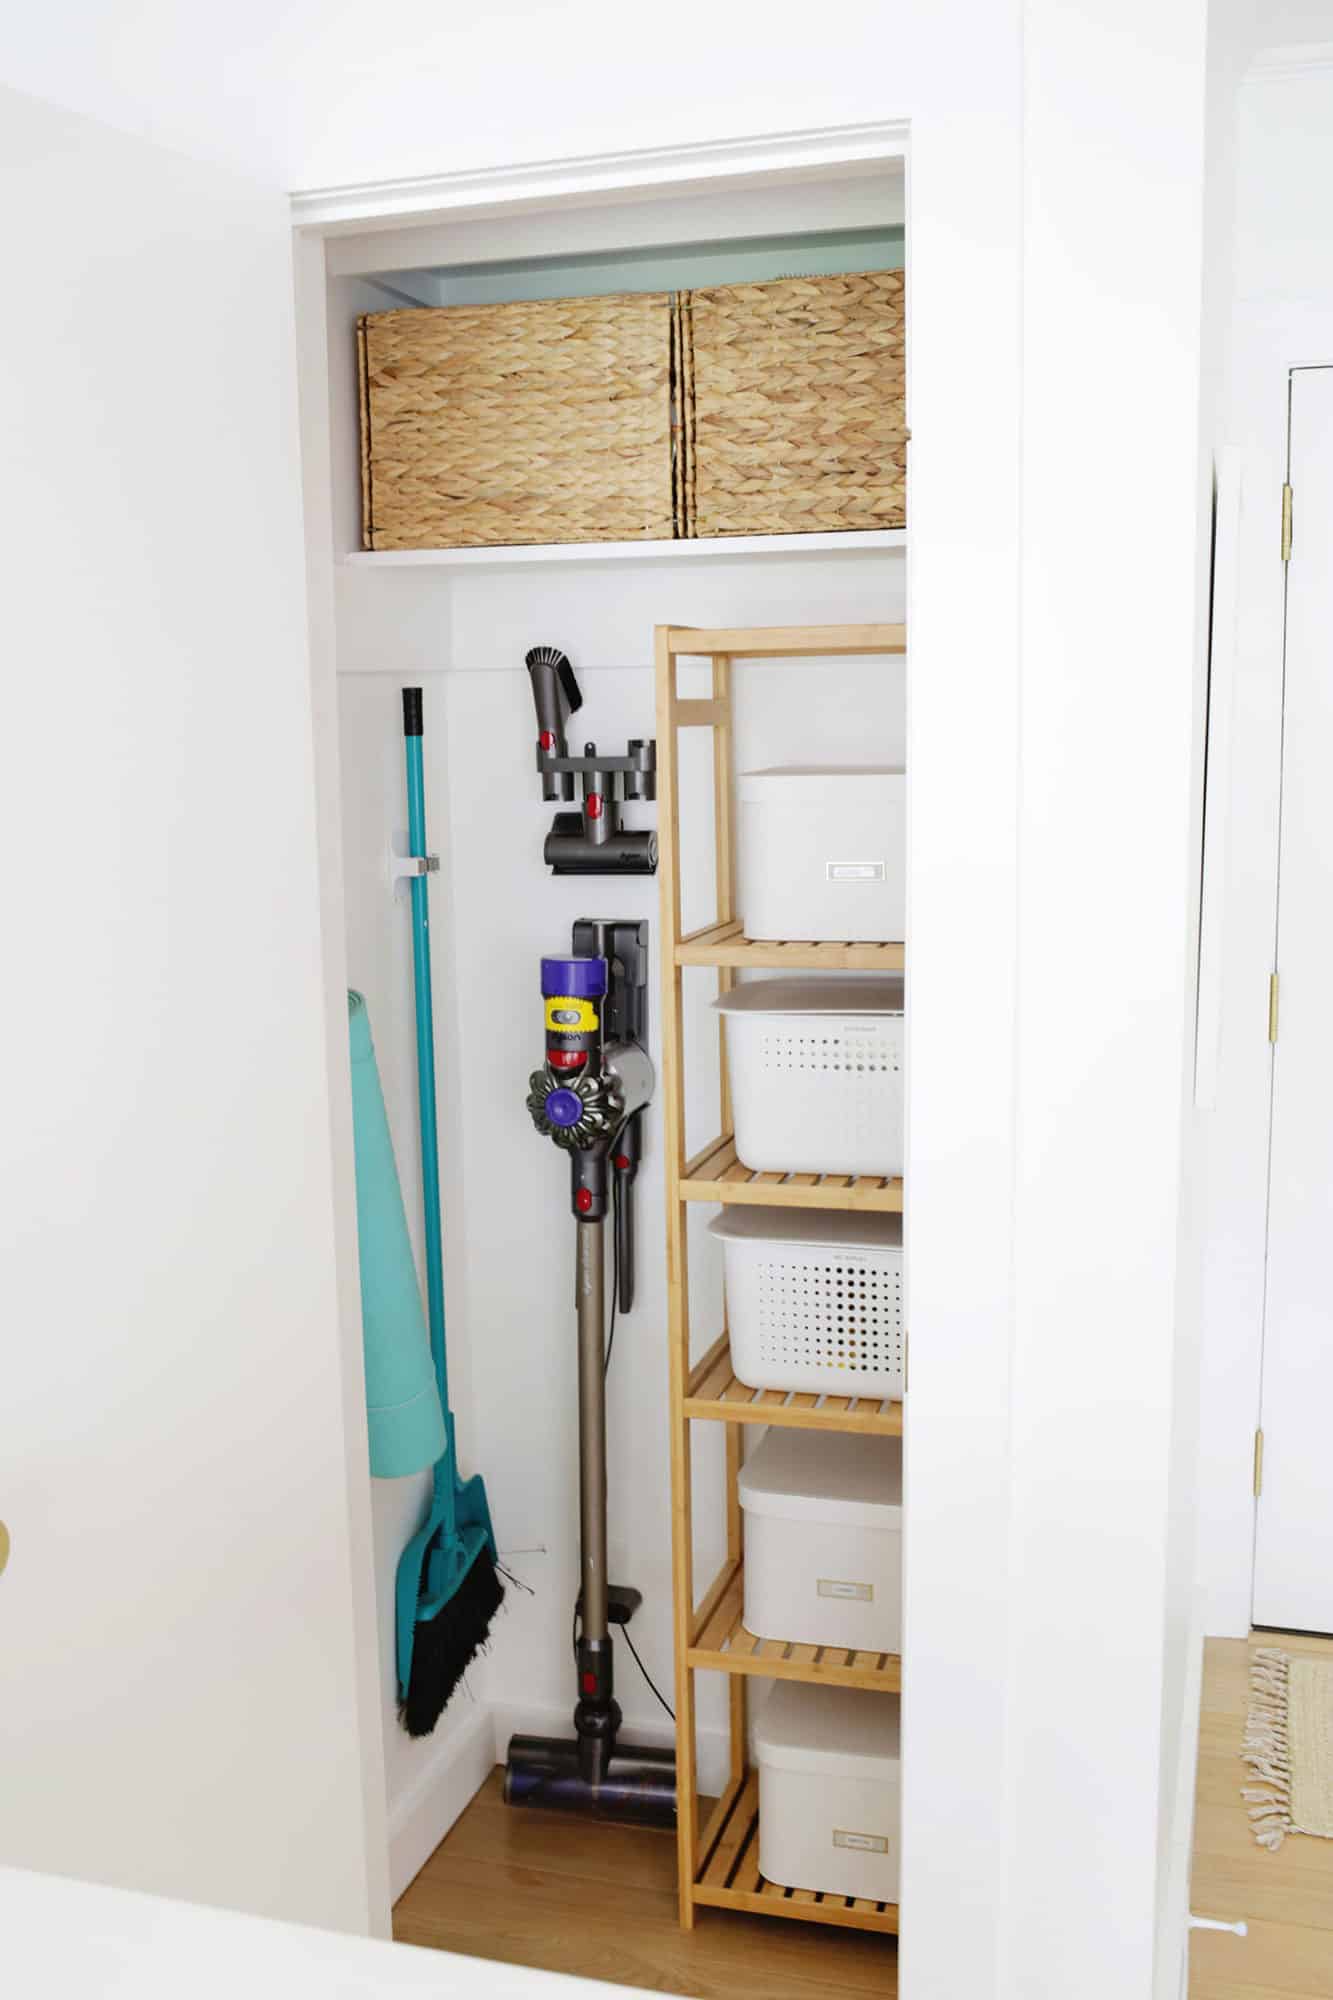
Use a standalone shelf rather than built-ins: I measured out how much room I needed on the left side of my closet for my hanging vacuum charger and I looked for a shelf that would fit the dimensions of the empty space to the right of that.
This bamboo shelf ended up being the perfect size and while I did have to put this shelf together, I could just slide it right in the closet and create instant shelves without having to build them from scratch (here’s a bigger option if you want more shelf space).
And, if you end up taking it out of the closet, you can always move it around and use it for storage/decor somewhere else! I used these boxes and these bins to organize each of my shelves.
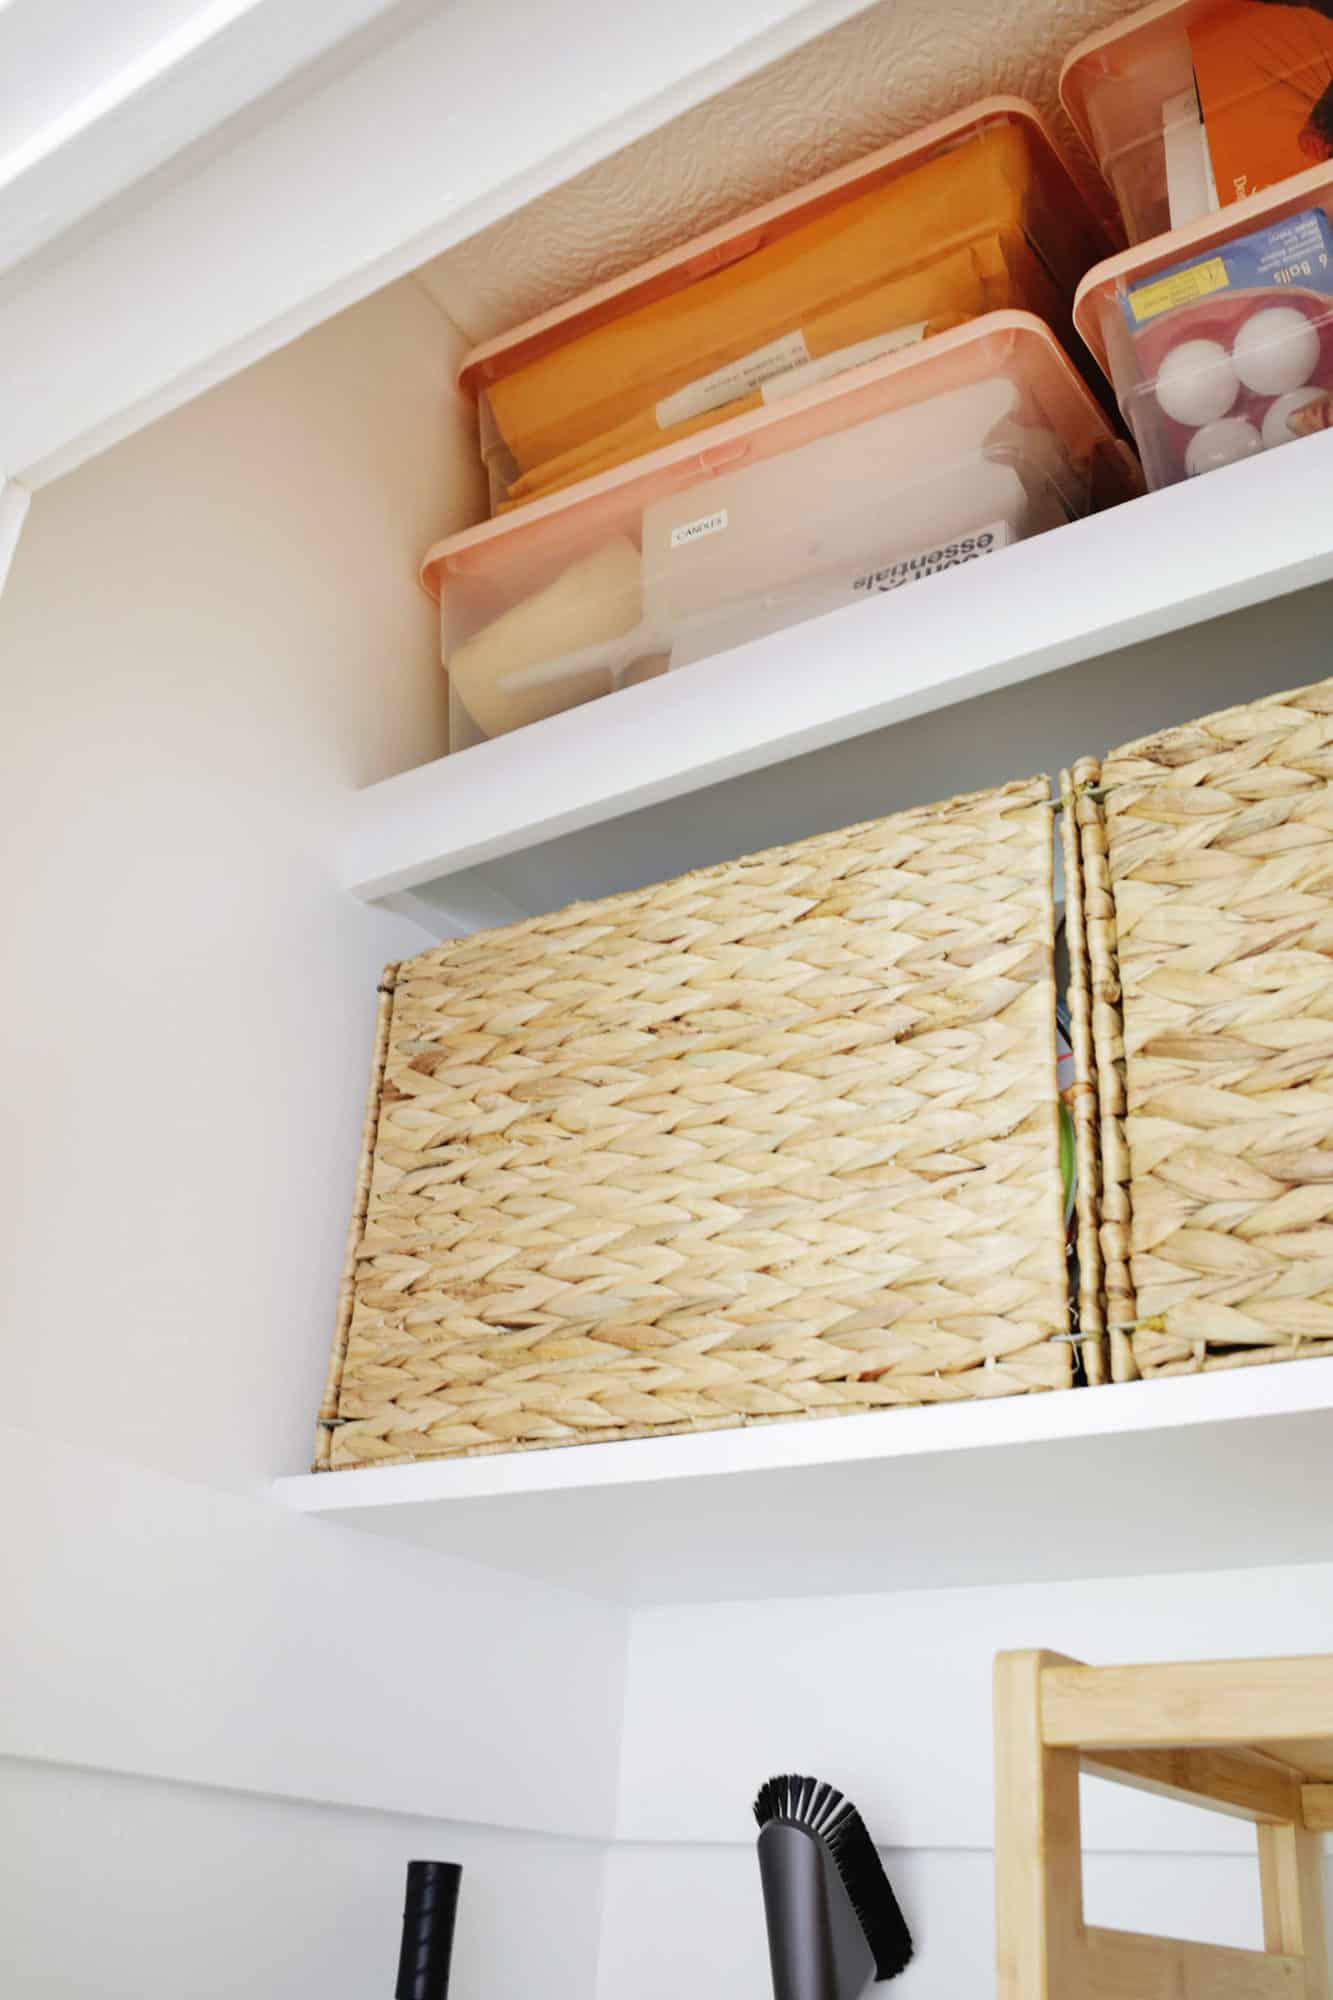
Make full use of existing shelves: A lot of closets will already have some sort of an existing shelf or two that you can use to organize a portion of your items. You can add dividers like these that can be easily taken off or moved or these stackable shelves that allow you to stack items on top of each other to get more space (these are great too!).
And of course, organizing all your items into storage boxes allows you to keep items contained and separated into categories (these woven boxes were the perfect size for my shelves). Make sure to add a label when you can so you can find things easily (this is my fave label maker!).


Look for removable/damage-free hooks and hangers: Since our closet is also functioning as a broom/vacuum closet, I found some command hook tool holders so I could easily hang a broom on the wall. Right now, I just need one, but it’s nice to know I can easily move it or add more if I decide to have another handled cleaning tool in here as well.
I also added a removable hook to hang a yoga mat on, so those are a great option for hanging just about anything (these hooks are pretty sleek looking as well).
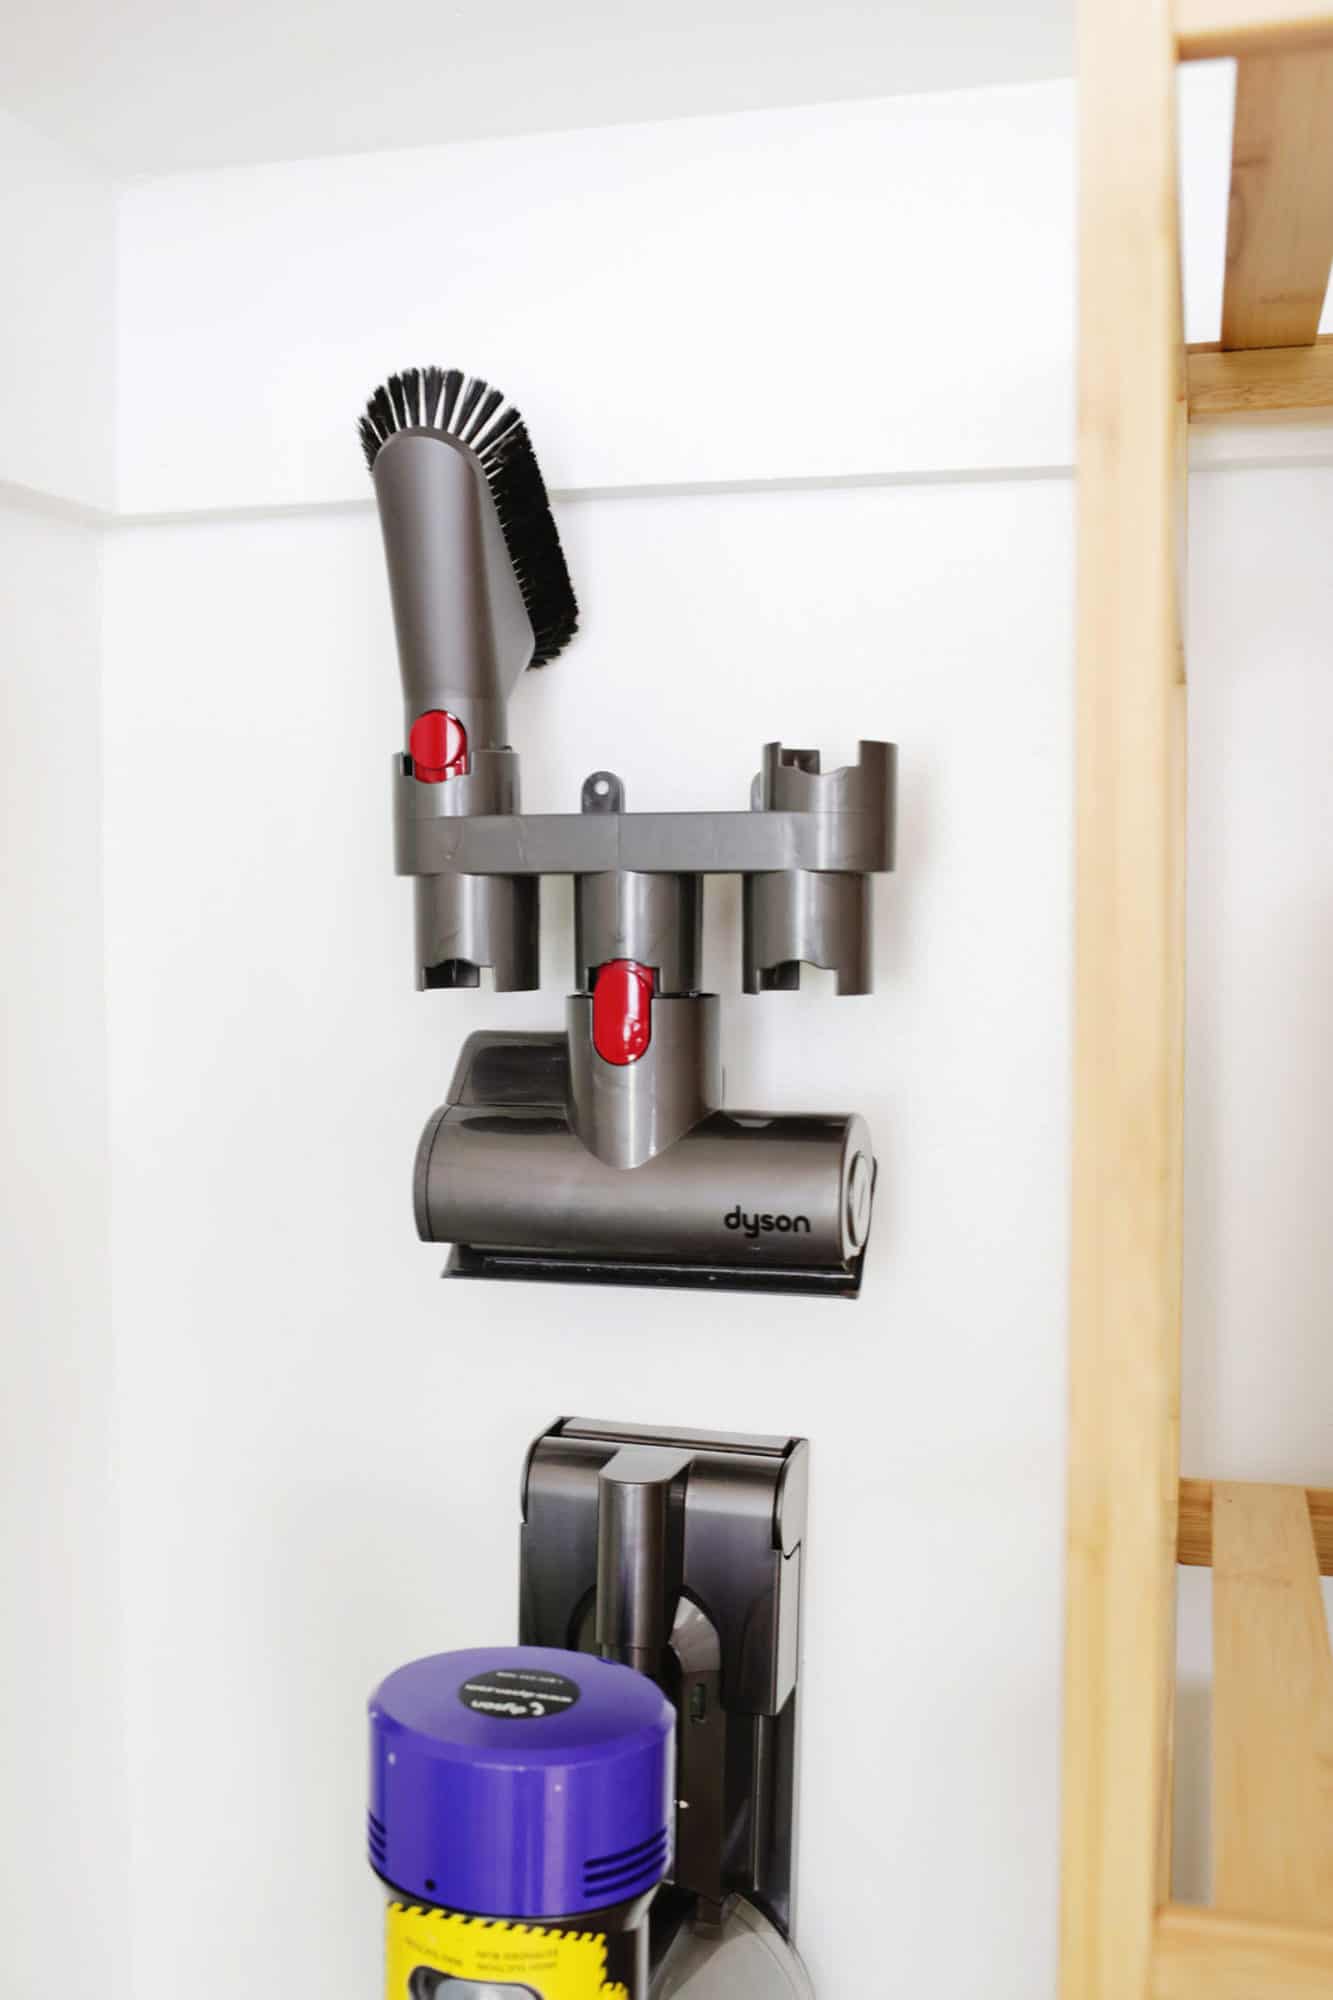
Turn non-removable items into removable ones! Most items that have any sort of flat back on them can be mounted with command strips instead of screws for easy removal later (just make sure you are getting the right size and using enough for the weight of the item).
For example, my vacuum attachment holder has holes and screws to mount it on the wall, but I just put command strips on the back of the mounting area and it’s hanging just as it would if I had used screws (check out all the different vacuum attachment organizers)!
Looking for more organizational inspiration? Check out these posts:
- Organize your hall closet (in one afternoon!)
- The top 5 bathroom storage mistakes
- How I organized my fridge (in one afternoon!)
There you go! Whether you want to set up a non-permanent closet because of renting or the option to be flexible in the future (or simply because building and power tools aren’t your thing), I hope these tips have given you some easy ideas to get the organized closet of your dreams! xo. Laura
Credits // Author and Photography: Laura Gummerman.