

I hate installing curtain rods. There I said it. In fact, I detest the task of hanging curtains so much that I often choose to forego having them at all in my own home. Recently, I opted to use just roller blinds in my own bedroom and I’m so happy with the modern look of naked windows:
But clients want curtains. They make a room feel polished. If windows are the eyes of a space, the curtains are the mascara. Installing window treatments makes the windows pop and instills a luxurious mood in the space.

Over the years, I’ve seen many tricks to install even curtains. Those tricks often include a myriad of tools; laser levels, traditional levels, measuring tapes, etc. They can be complicated and those hacks often allow for human error. Even just a millimeter miscalculation can result in wonky and uneven curtains.
So today I’m going to show you the one fail-proof way to install curtain rods in your own home and get even curtains every time. And all you need is a piece of trash.

*this post contains affiliate links + advertising*
I get a commission when you buy through my links that helps cover the costs of hosting this free tutorial site.
site operating fees are expensive but my commission costs you nothing. thanks for your support!
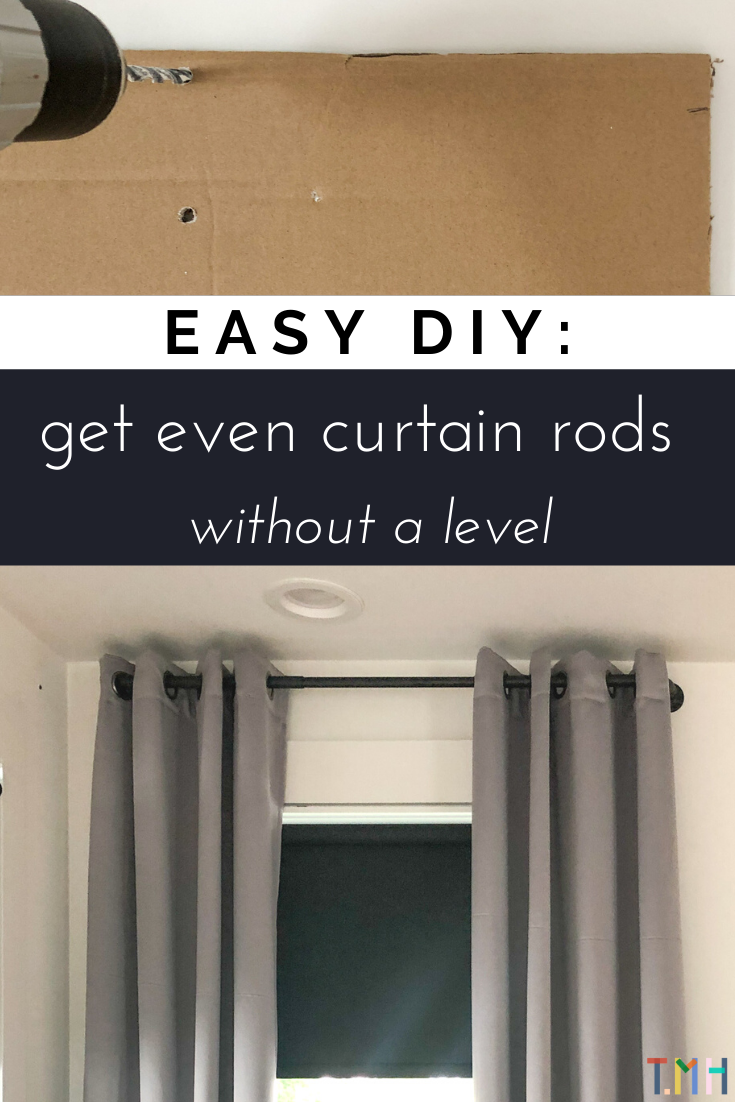
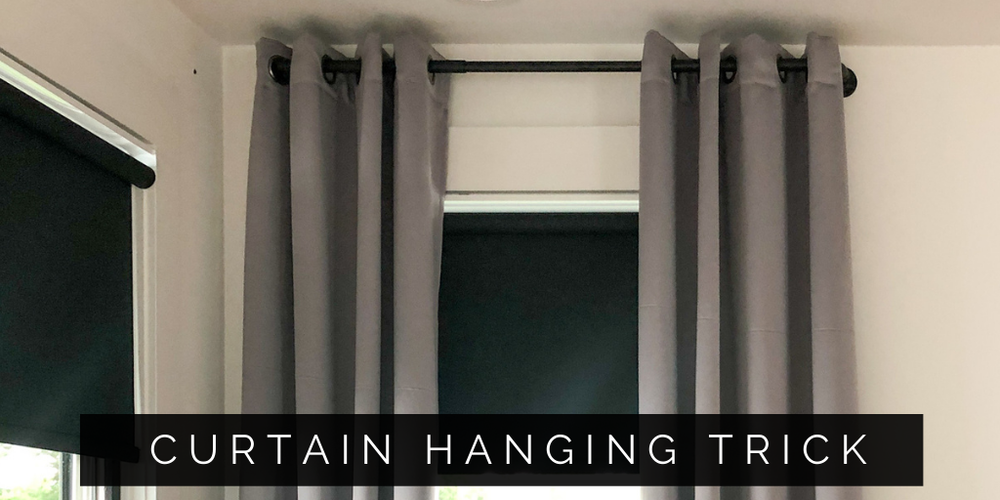
MY NO-FAIL LEVEL CURTAIN HANGING GUIDE
project details
handiness level: beginner
time required: ~ 15 minutes per rod
safety: wear protective eye equipment and a particulate mask during this project.
materials + tools needed:
large piece of scrap cardboard
pen
scissors
drill
hammer
wall anchors
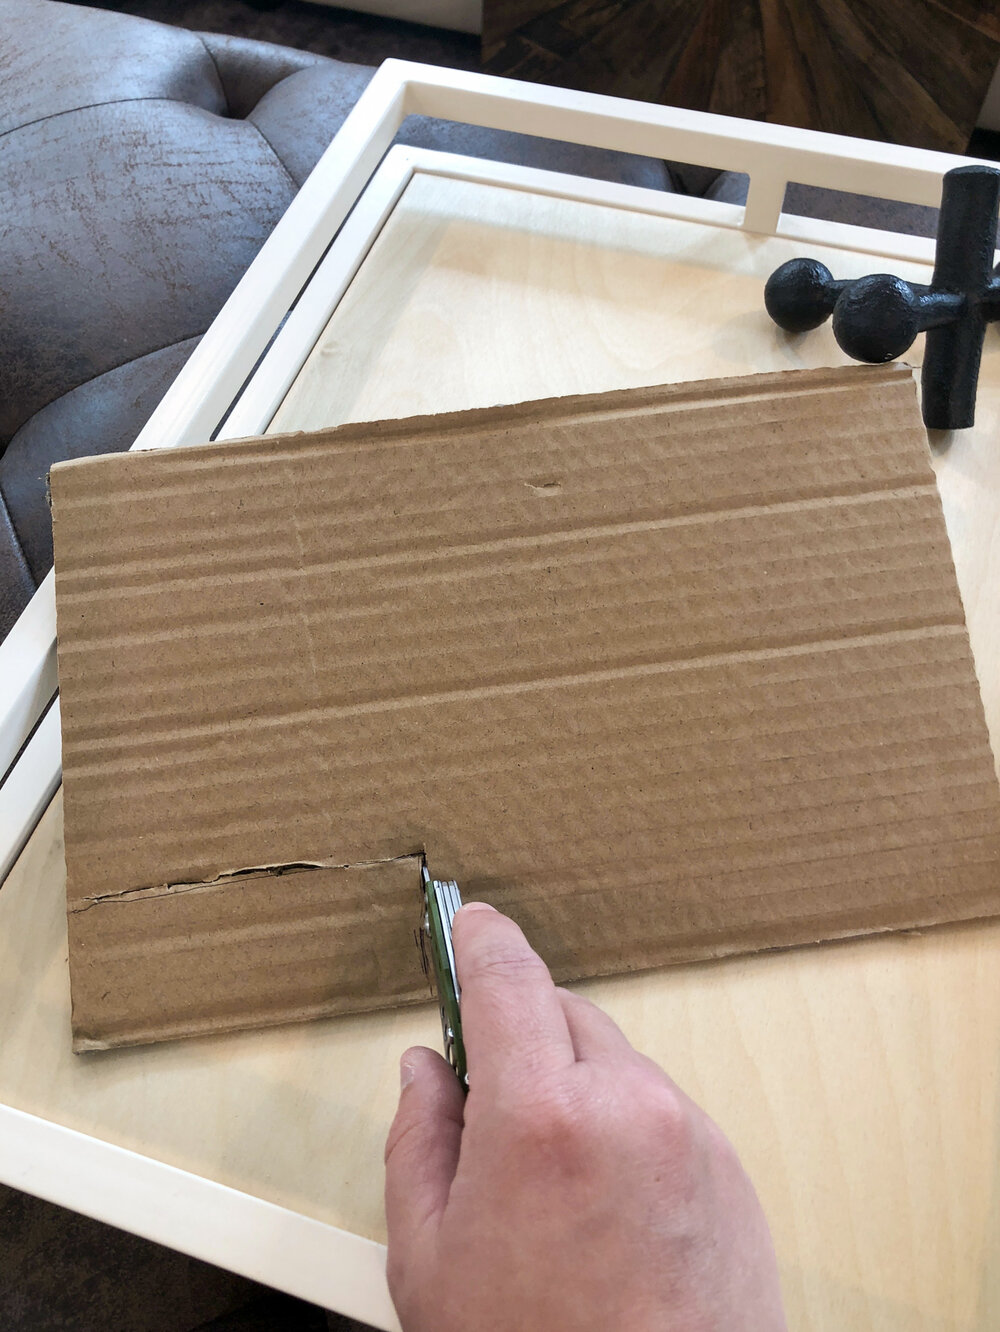
STEP ONE: using a flat piece of cardboard, cut a 45 degree notch out of one corner.
This will allow you to place your guide directly above and beside the window trim. This method works best if your windows have moulding installed around them. The trim will allow your cardboard to rest in place on the edge of the moulding.
If your windows do not have trim, you can still use this method by holding the cardboard in place on exactly the 45 degree edge while making your template markings (step 2 and 3).
If your windows aren’t square, you can still use this method by incorporating a level to make your own 45 degree angle, using the highest and widest points of the window and marking it on the wall.
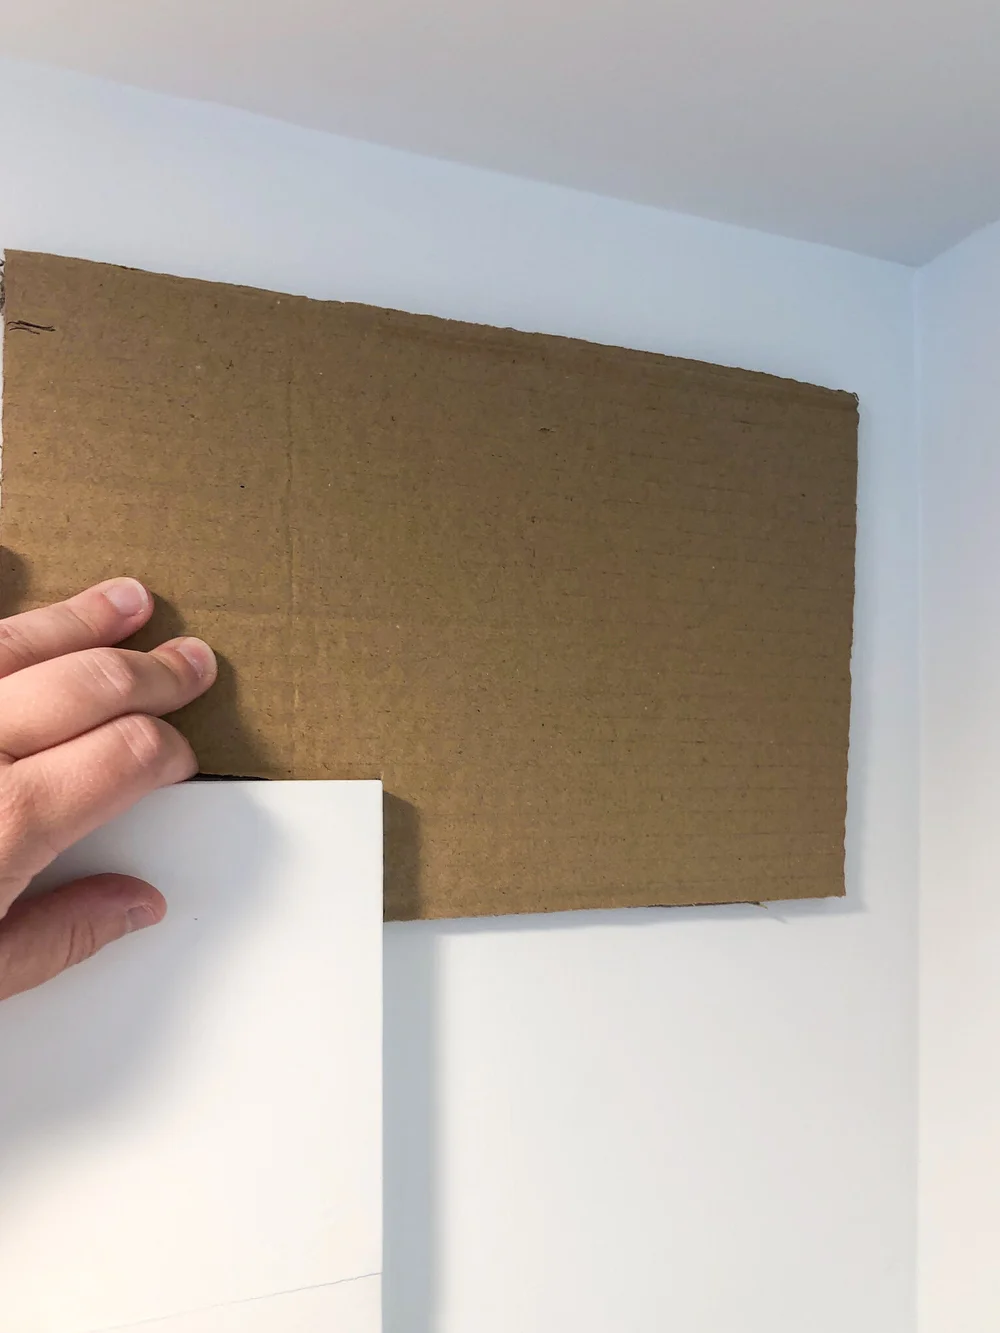
STEP TWO: place your cardboard with the 45 degree notch situated around the window trim (as pictured). On your cardboard, mark where you want your rod to land, in relation to the window and ceiling.
The cardboard should rest on the edge but if it moves, use a strip of delicate painter’s tape to secure it in place while you make your pilot holes (next step).
If your windows do not have trim, you can still use this method by holding the cardboard in place on exactly the 45 degree edge while making your template markings (step 3).
If your windows aren’t square, you can still use this method by incorporating a level to make your own 45 degree angle, using the highest and widest points of the window and marking it on the wall.

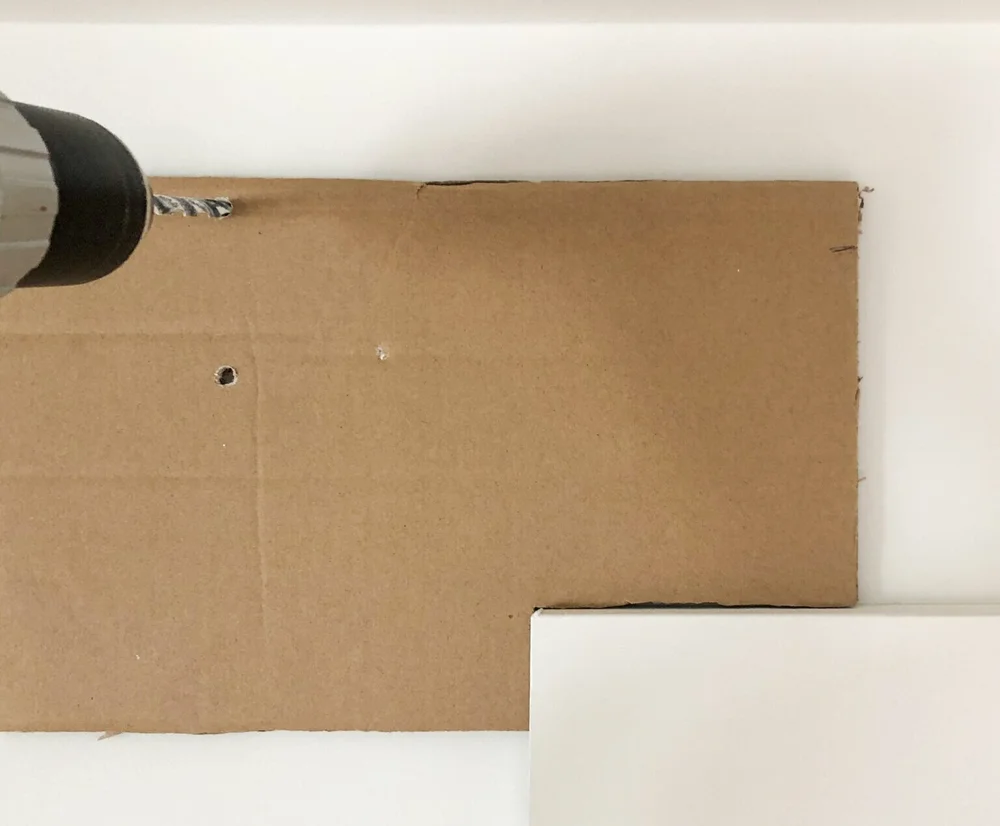
STEP THREE: bring your cardboard back to ground level and place it on a horizontal surface with the rod’s screw holes resting where you made your previous mark. Using a pen, mark the holes where your screws are to be installed on the cardboard.
If your rod comes with separate hanging hardware (most curtain rods have a hook style bracket that allows the rod to rest inside it), follow this method, using only the hardware hook portion of the rod to make your guide.

STEP FOUR: place the cardboard back on the wall using the same corner method as before. Use the screw hole markings you just made to drill your pilot holes. Drill through the cardboard and into the wall.
This will BE your template that you’re going to use on the opposite side of the window and on each subsequent window so use care and make sure you go into through the cardboard and into the wall.
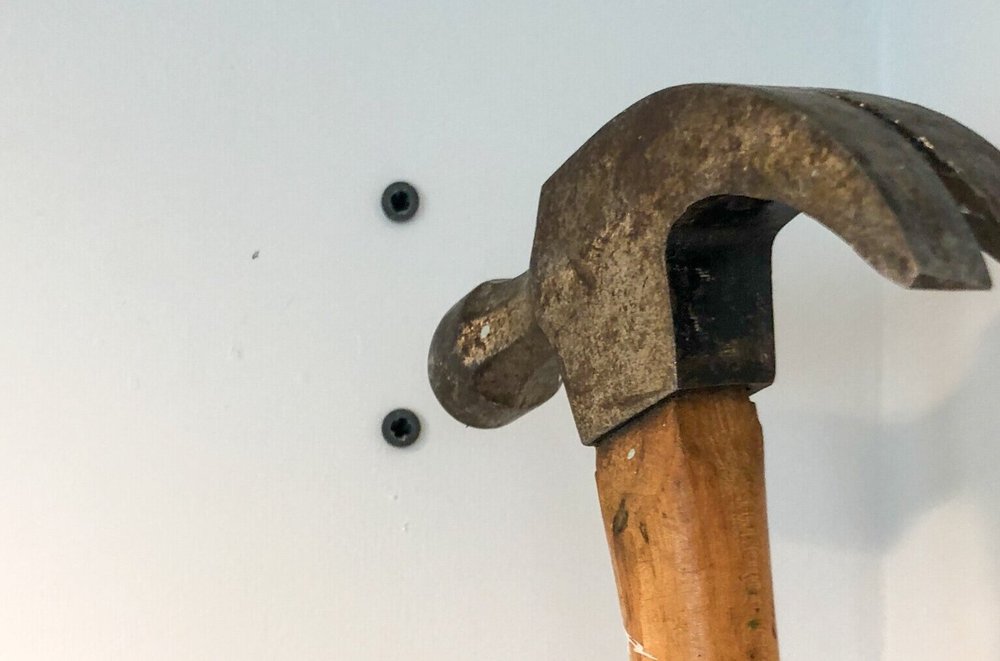
STEP FIVE: place the cardboard to the side (do not toss it!) and install your wall anchors.
For drywall, you can use the anchors included with your curtain rod. Use a hammer to gently tap them securely into place, as shown.
If your curtains are heavy (like velvet), I recommend using these self-drilling drywall anchors as they grip much better.
If you have plaster walls, I prefer these molly bolts.
At this stage, your window will look like this:
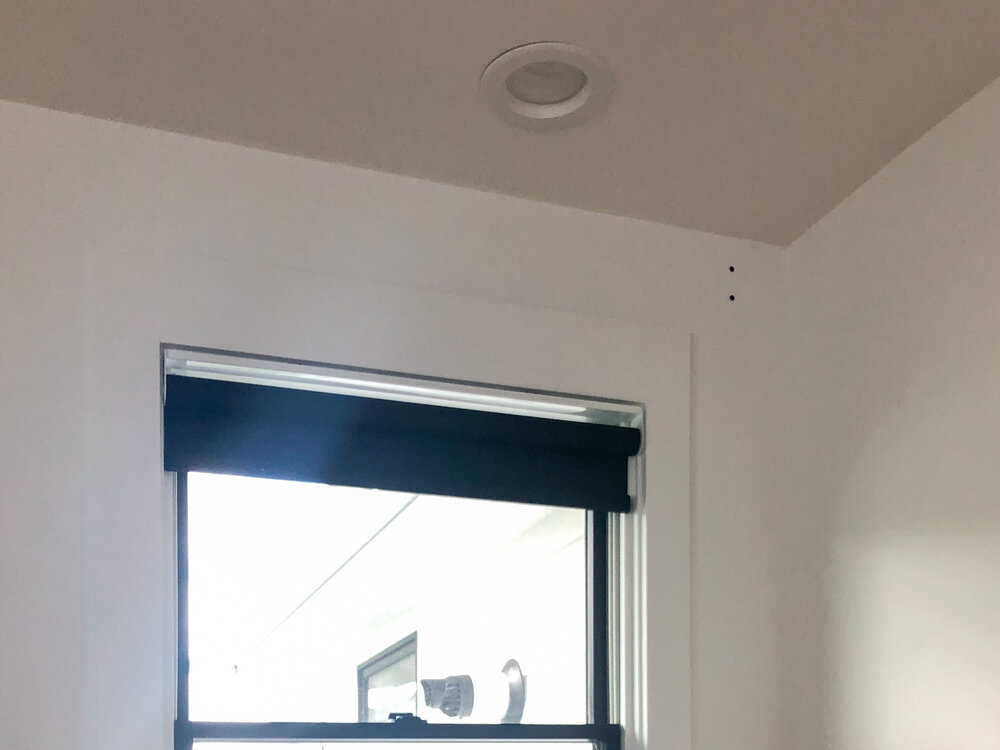
You will have installed anchors into the right side of the window but do not place your bracket just yet.
STEP SIX: flip your cardboard over so it’s a mirror image and place it on the window trim on the left side exactly as before. You should have drilled through the cardboard so that your holes will line up exactly evenly - and angled identically - on the opposite side of the window.
Follow steps four and five from above.
Your window should now look like this:

Note that on the top left side, there is no anchor installed. That’s because I ran into a stud while drilling my pilot hole. If this happens, you will not need an anchor as your screw will be secured directly into wood.
If you have lathe and plaster walls, you may find the lathe tricks you into believing you’ve found a stud. Drill past the lathe to make sure your anchors will be secure.
If you aren’t sure which material your walls are made of, a good way to determine is by knowing the age of the house. If your house was built before the 1950s and has never undergone a total gut renovation, you most likely have plaster walls.
Now you can install your curtain hardware and your curtains!
If you are installing multiple windows in your home, I recommend saving your cardboard template to use on every window. This promotes continuity throughout the home when all your window coverings are installed at the same height and width.

HOW HIGH TO HANG CURTAINS
a brief explanation of curtain lengths
To make a room feel taller, hang your curtain rods 4-6 inches above window frames. Extending the rod 3-6 inches beyond both sides of the frame makes a window feel grand and allows more light to shine through when drapes are open.
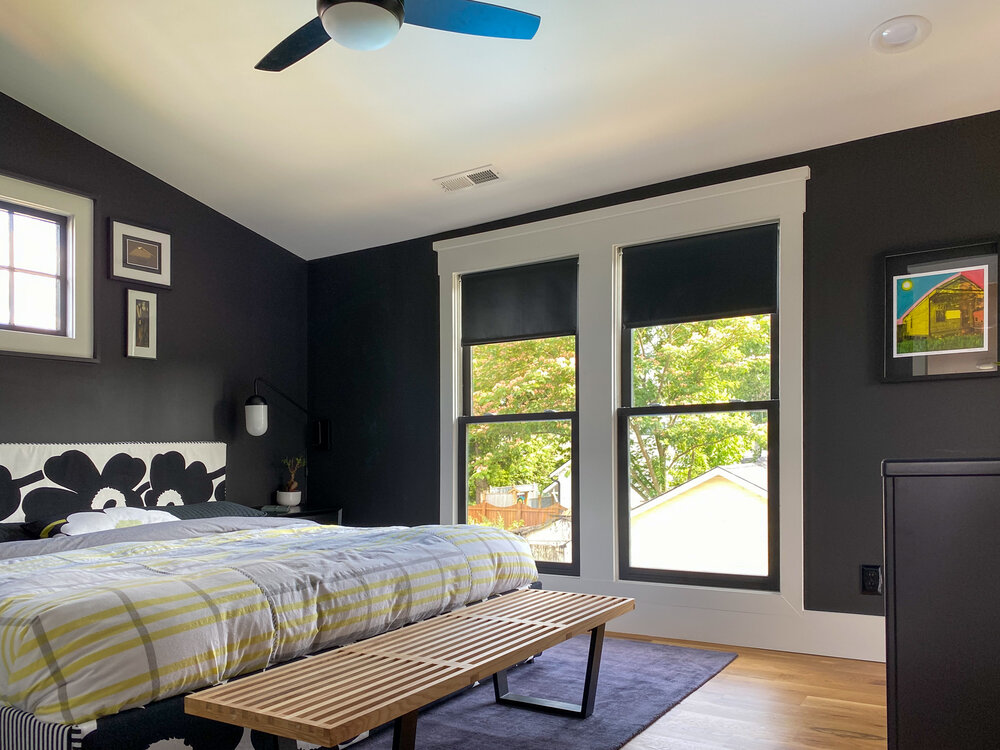
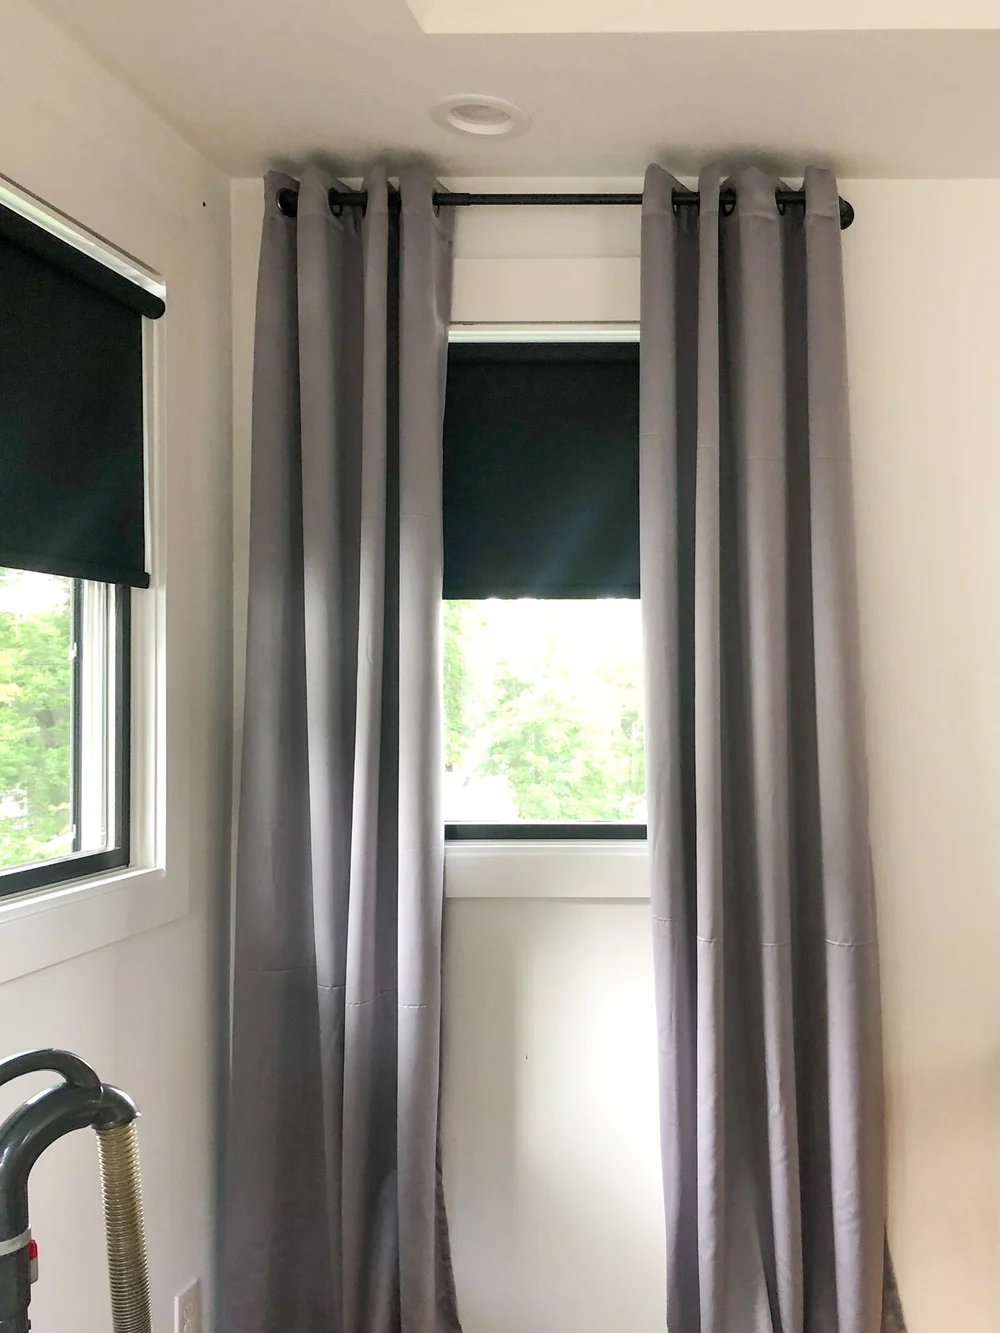
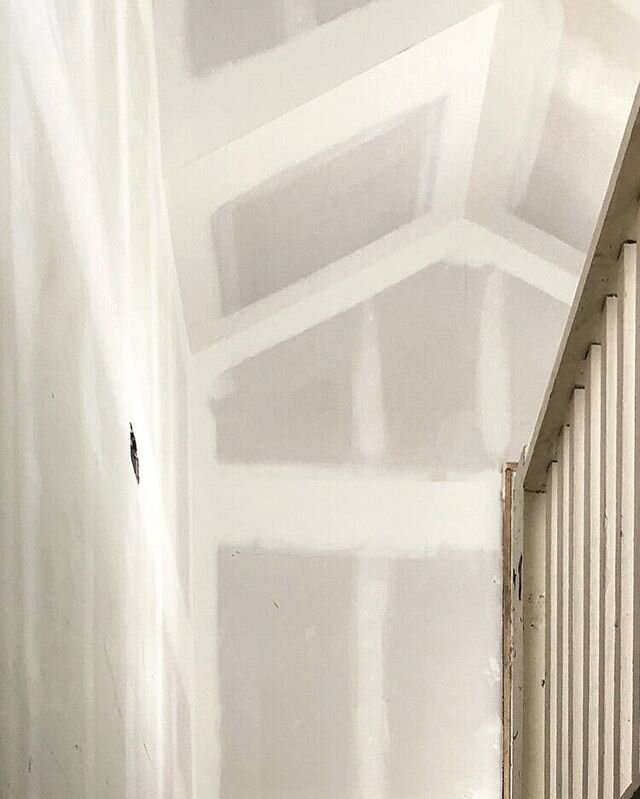
If you have a tray ceiling, like the one shown in my client’s home above, you’ll want to leave 2-3 inches of height between the rod and the ceiling to keep the curtains operable.

The length of your drapes can have great impact on the look of a window too. For a clean, casual look, hang drapes so that they fall just a 1/2 inch above the floor – especially if you open and close your drapes frequently.
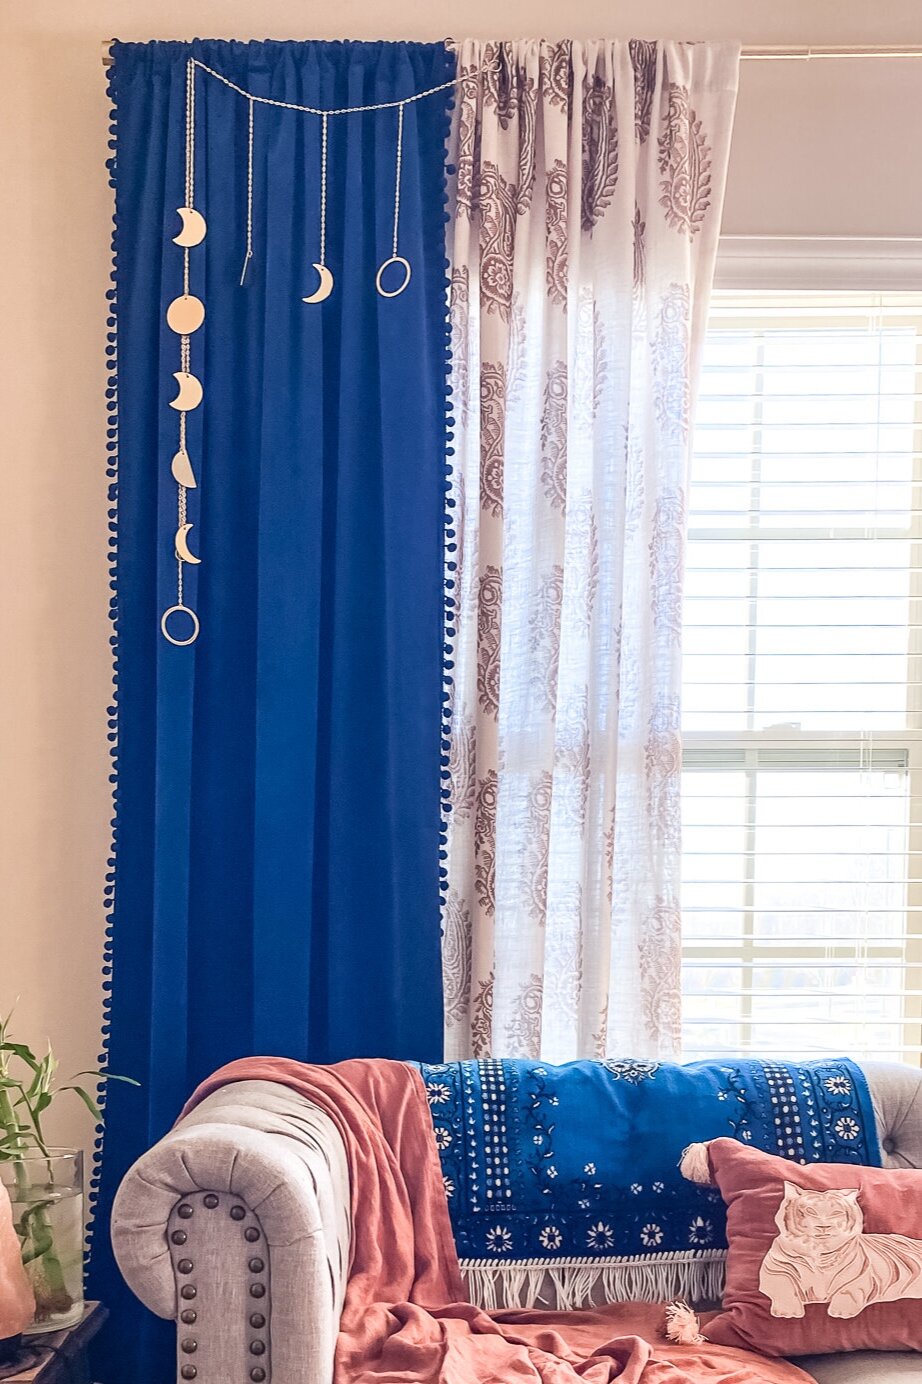
For a luxurious puddle effect, like the one I created in the image above, add 6-8 inches to the rod-to-floor measurement of the drape.
LAYERING CURTAINS
For additional warmth and dimension in a room, consider installing layered curtains in contrasting fabrics and colors on the same window.
You can do this by installing a sheer panel on the interior of the rod and a thicker panel on the outside, as I did in the image above. Or you can use a double panel hanging rod to allow the curtains to move freely and independently of one another.
CURTAIN HARDWARE MATERIALS
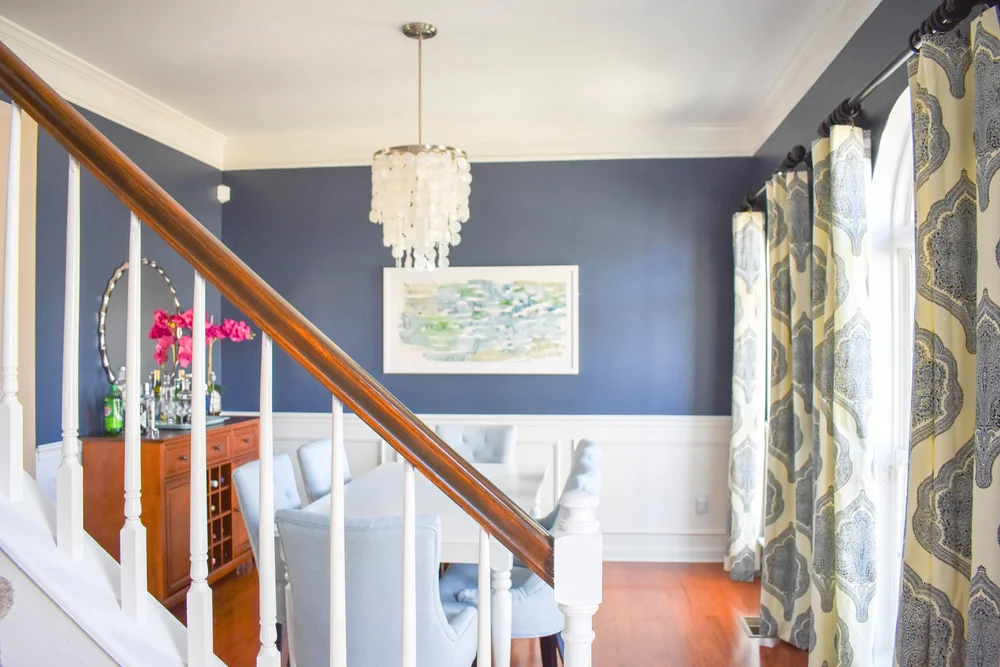
Depending on the style you want for your home, you may choose to use curtain rings to secure your curtain panels to the rod. This gives a sophisticated and more traditional look to the space, as seen in my traditional dining room design pictured above.
Metal curtain rods and hardware will have a more modern feel while wood rods convey a traditional aesthetic.
If you’re on the fence, know that wood rods can be custom cut to any length and many final options are available to create the look you want. These rods come at a higher cost than adjustable metal rods. Since curtains can be expensive, consider your entire room budget as you make your decisions on materials.
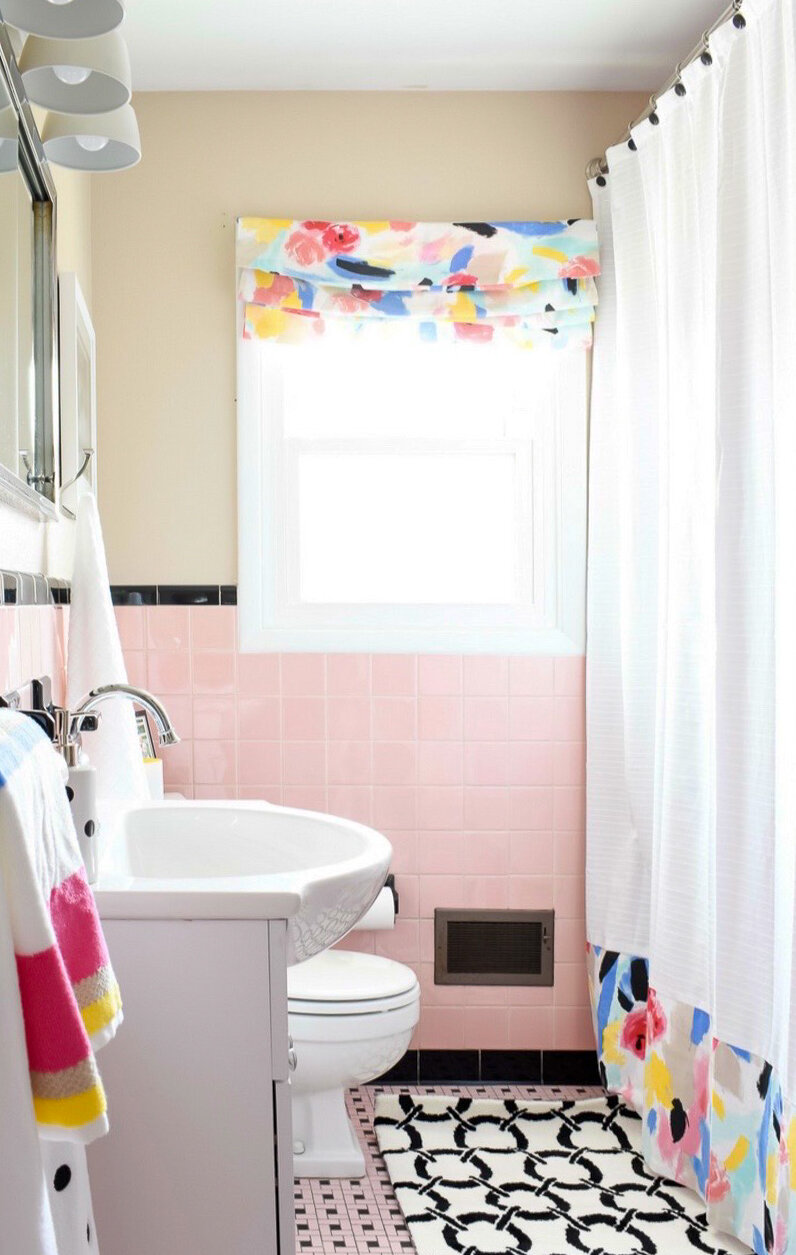
Remember that you don’t need curtains to create softness in a space. I often use custom roman blinds to incorporate textiles in many of my projects, as shown above, without the visual clutter of a room filled with fabrics.
I hope this guide helps you determine the best window treatments for your style and budget. Remember to pin it for later so you can refer back when it’s time to hang your own window treatments in your home!
I’ll be back soon with more updates to inspire you and DIY projects to help you learn.
Until then, stay safe and sane.
xoxo
Teri
DECORATING ON A BUDGET ISN’T ALWAYS EASY BUT I’M HERE TO HELP.
Commenting on this post is disabled so I can focus on our upcoming projects + client designs but that doesn’t mean that I don’t want to hear from you. Send me your questions and comments on Instagram by either commenting on my latest post or sending me a direct message. I really love to chat it out!


is site contains affiliate links + advertising*
I get a commission when you buy through my links that helps cover the costs of hosting this free tutorial site.
Site operating fees are expensive but my commission costs you nothing. thanks for your support!